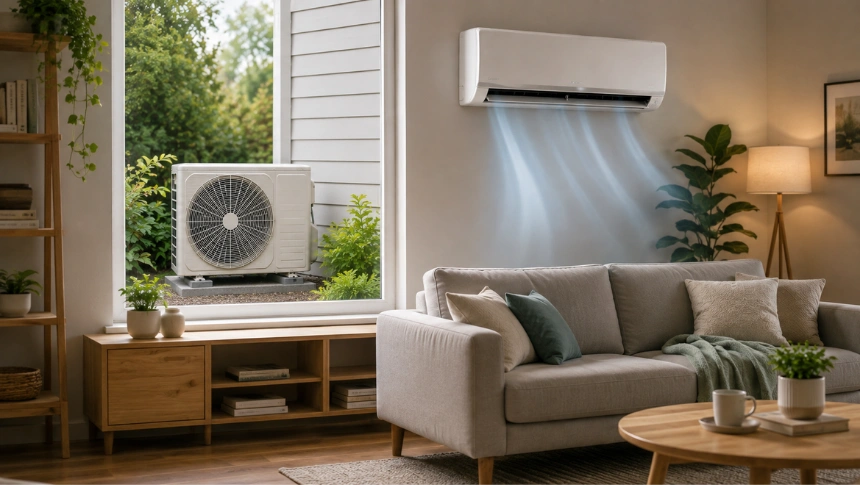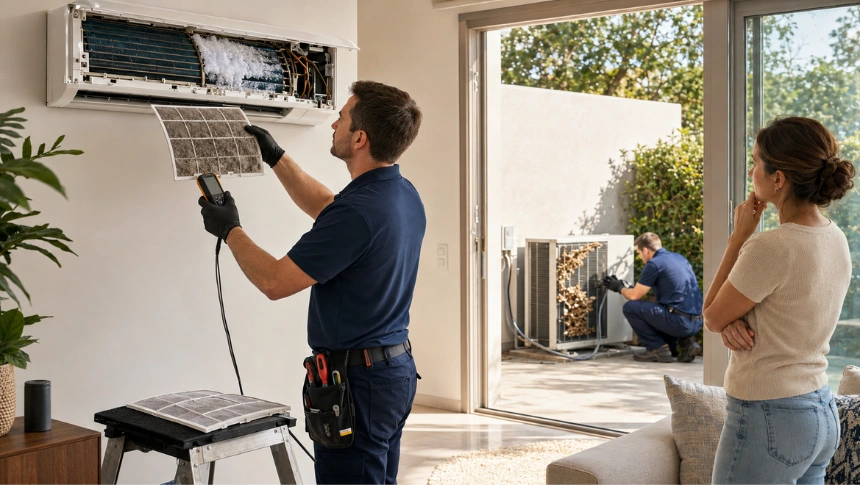

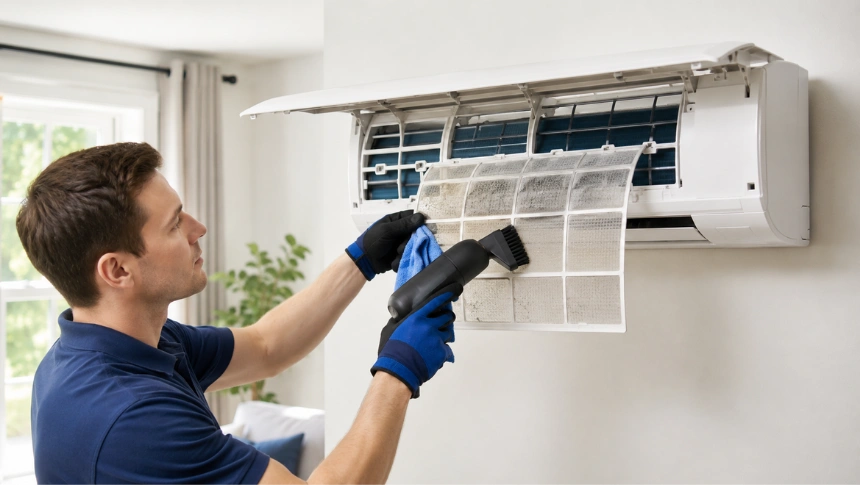
Over time, dust and dirt can build up on your wall-mounted heat pump, particularly around the filters and accessible indoor components. When airflow becomes restricted, you may notice weaker air movement, reduced heating or cooling performance, or more dust around the unit. The good news is that basic cleaning is often a straightforward maintenance task that can help keep your system performing well.
However, not every part of a heat pump should be cleaned or opened by a homeowner. In this guide, we’ll cover what you need before starting, how to safely clean the indoor unit and filters, what to check around the outdoor unit, how often cleaning may be needed, and when professional help is the better option. Regular cleaning is only one part of looking after your system, so our Heat Pump Maintenance Checklist can help you stay on top of other routine tasks.
Why Should You Clean a Wall Mounted Heat Pump?
Dust and dirt naturally build up on the filters of a wall-mounted heat pump as it operates. When these filters become clogged, airflow can be restricted, which may make the system work harder to heat or cool your home. Over time, you may notice weaker airflow or reduced performance. Regular cleaning helps maintain better airflow and allows the system to operate more effectively.
Cleaning also gives you a chance to spot visible issues before they become more serious. While checking the unit, look for mould, excessive dirt, damage or anything that appears unusual. However, cleaning is not a replacement for professional servicing. If the heat pump has a fault, persistent performance problems or requires internal repairs, it should be inspected by a qualified professional.
What Do You Need to Clean a Wall Mounted Heat Pump?
Before you start, have the basic cleaning items ready so you can clean the accessible parts of the unit without using anything that could damage its surfaces or filters. Always check the manufacturer’s instructions first, as cleaning requirements can vary between models.
Basic Cleaning Items
- Vacuum cleaner with a soft brush attachment: Useful for gently removing loose dust from filters and accessible areas.
- Soft, clean cloth: Use this to wipe dust from the exterior and other accessible surfaces.
- Mild detergent: Only use a mild cleaning solution if the manufacturer recommends it for the relevant parts.
- Warm water: Washable filters can usually be rinsed with warm water when permitted by the manufacturer’s instructions.
- Dry towel: Keep a clean towel available for drying filters after washing.
Avoid using harsh chemicals, excessive water or abrasive cleaning materials unless specifically recommended by the manufacturer.
How to Clean a Wall Mounted Heat Pump Step by Step
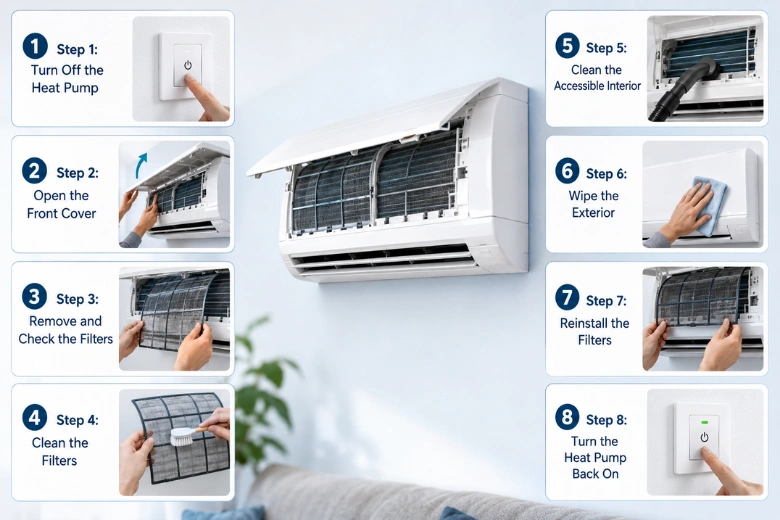
Before starting, check the manufacturer’s instructions for your specific model and avoid opening components that require professional attention.
Step 1: Turn Off the Heat Pump
Safety should come first before you begin cleaning. Make sure the heat pump is completely switched off before touching the filters or other accessible parts.
- Turn the unit off: Use the normal controls on the remote or the unit itself.
- Allow it to stop: Give the system time to finish operating before you begin cleaning.
- Follow the manufacturer’s instructions: If your model requires additional power isolation before cleaning, follow the instructions provided for that unit.
- Don’t clean while operating: Never attempt to remove filters or clean the unit while the heat pump is running.
Avoid opening electrical panels or attempting to access internal components that are not intended for routine homeowner maintenance.
Step 2: Open the Front Cover
Once the heat pump is switched off, carefully open the front cover to access the filters. The cover should open smoothly when handled according to the manufacturer’s instructions.
- Lift the cover carefully: Follow the opening method recommended for your specific model and avoid applying unnecessary force.
- Don’t force the cover: If it feels stuck or doesn’t open easily, stop and check the manufacturer’s instructions rather than trying to pull it open.
- Locate the filters: Once the cover is open, identify the removable filters so you can clean them in the next step.
Take your time at this stage to avoid damaging the cover or its fittings.
Step 3: Remove and Check the Filters
Take a moment to inspect them before cleaning, as the condition of the filters can give you an idea of how much dust and dirt has built up inside the unit.
- Remove the filters carefully: Follow the recommended removal method and avoid bending or damaging them.
- Check for dust: Look at how much dust has accumulated on the filter surface. Heavy build-up can restrict airflow.
- Look for mould or unusual contamination: Check for visible mould, excessive dirt or anything that doesn’t look normal.
- Know when to stop: If mould or contamination extends beyond the easily accessible filter or surface areas, don’t attempt to clean deep inside the unit yourself. Professional cleaning may be more appropriate.
Once you’ve checked the filters, you can determine whether they need vacuuming, washing or replacement according to the manufacturer’s instructions.
Step 4: Clean the Filters
Once the filters are removed, clean them according to the manufacturer’s instructions. The right method depends on the type of filter, so avoid washing a filter unless it is specifically designed to be cleaned with water.
- Remove loose dust: Use a vacuum cleaner with a soft brush attachment to gently remove dust from the filter surface.
- Wash washable filters: If the manufacturer allows washing, gently rinse the filters with appropriate water and use a mild detergent if recommended.
- Avoid harsh cleaning: Don’t scrub the filters aggressively or use strong chemicals that could damage the filter material.
- Dry completely: Place the filters in a suitable area and allow them to dry fully before putting them back into the heat pump.
- Never reinstall wet filters: Moisture left on the filters can affect the unit and may contribute to unwanted moisture or mould.
Once the filters are completely dry, they can be carefully reinstalled according to the manufacturer’s instructions.
Step 5: Clean the Accessible Interior
With the filters removed, you can gently clean dust from the parts of the indoor unit that are easy and safe to reach. Keep the cleaning light and avoid trying to reach deeper internal components, as these may require professional attention.
- Remove loose dust: Use a soft brush or a vacuum cleaner with a soft brush attachment around accessible dusty areas.
- Clean gently: Avoid applying excessive pressure, particularly around delicate fins and other components.
- Don’t force tools inside: Only clean areas you can reach safely without pushing brushes or vacuum attachments deep into the unit.
- Avoid internal repairs: If you notice heavy dirt, mould or a problem inside an inaccessible area, don’t attempt to dismantle the unit yourself.
The aim is to remove accessible dust without disturbing or damaging the internal components of the heat pump.
Step 6: Wipe the Exterior
After cleaning the accessible interior areas, wipe the outside of the indoor unit to remove any remaining dust or marks. This helps keep the unit clean without exposing its internal components to unnecessary moisture.
- Use a slightly damp cloth: Gently wipe the front cover and other accessible exterior surfaces.
- Remove visible dust: Pay attention to areas where dust has collected around the cover and edges.
- Avoid excess moisture: The cloth should be damp rather than soaking wet.
- Don’t spray or pour water: Never spray cleaning products or pour water directly into the heat pump, as moisture can reach electrical components.
Once the exterior is clean, leave the unit open or accessible as recommended by the manufacturer while you complete the remaining cleaning steps.
Step 7: Reinstall the Filters
Once the filters are completely clean and dry, carefully put them back into the indoor unit. Correct installation is important to ensure proper airflow and prevent the filters from becoming loose during operation.
- Check that they are completely dry: Do not reinstall filters while they are still damp.
- Position them correctly: Slide or place each filter back into its original position according to the manufacturer’s instructions.
- Secure the filters: Make sure they sit properly and are not loose or incorrectly aligned.
- Close the front cover: Gently close the cover and ensure it is properly secured before switching the heat pump back on.
Once everything is correctly in place, you can restore normal operation and check that the heat pump is running as expected.
Step 8: Turn the Heat Pump Back On
Once the filters are correctly installed and the front cover is securely closed, you can return the heat pump to normal operation. Give the system a little time to start and check that everything appears to be working as expected.
- Check the start-up: Turn the heat pump on using the normal controls and make sure it starts operating normally.
- Listen for unusual sounds: Pay attention to any new or unusual noises that weren’t present before cleaning.
- Check the airflow: Make sure air is coming from the unit and the airflow feels normal.
- Check performance: Confirm that the system is providing heating or cooling as expected for the selected setting.
- Watch for warning signs: If an error code, unusual smell or other unexpected issue appears, switch the system off if appropriate and seek professional advice.
If everything is operating normally, your basic cleaning routine is complete.
How to Clean the Outdoor Unit
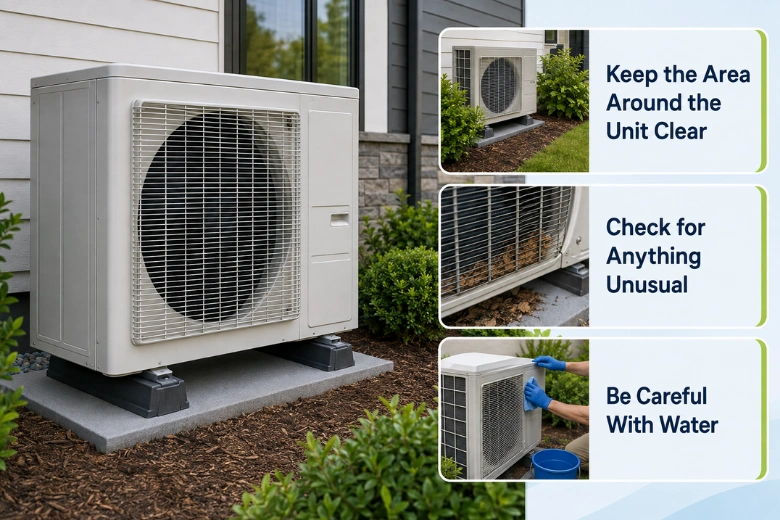
The outdoor unit doesn’t usually need the same type of cleaning as the indoor filters. For routine homeowner maintenance, the main goal is to keep the area around the unit clear so air can move freely. Before cleaning anything, check the manufacturer’s instructions and only carry out tasks that are recommended for your model.
Keep the Area Around the Unit Clear
Leaves, grass, plants and other debris can gradually build up around the outdoor unit. Remove loose debris and trim vegetation that has grown too close. Also check that bins, tools, furniture or other objects aren’t leaning against or sitting directly around the unit.
Check for Anything Unusual
While you’re clearing the area, take a quick look at the unit itself. Visible corrosion, heavy dirt, insect nests or other unusual signs may indicate that the system needs further attention. Don’t remove covers or attempt to access internal components yourself.
Be Careful With Water
Avoid using a hose or pressure washer around the outdoor unit unless the manufacturer specifically recommends it. Never spray water directly onto electrical wiring, the fan motor or other electrical components.
For deeper outdoor-unit cleaning, follow the manufacturer’s guidance or arrange professional servicing.
Homeowners can safely keep the area around the outdoor unit clear, but detailed cleaning of the unit itself should be handled according to the manufacturer’s instructions or by a qualified professional.
When Should You Get a Wall Mounted Heat Pump Professionally Cleaned?
Basic filter cleaning can be handled as part of routine home maintenance, but some problems indicate that the unit needs more than a simple clean. Professional attention is recommended if you notice mould inside the unit, persistent unpleasant smells, indoor water leaks, weak airflow after cleaning the filters, or poor heating or cooling performance. Unusual noises and repeated error codes should also be checked rather than ignored. Heavy dirt build-up in areas that you cannot safely reach is another reason to avoid attempting deeper cleaning yourself.
If cleaning the accessible parts doesn’t resolve the problem, professional heat pump service provider can help determine whether deeper cleaning, servicing or further repairs are required.
Conclusion
Cleaning a wall-mounted heat pump is a simple but important part of routine care. Check and clean the filters regularly, and keep the outdoor unit and surrounding area clear to support good airflow and efficient operation.
Avoid attempting electrical, refrigerant or deep internal repairs yourself. If cleaning doesn’t resolve persistent problems, arrange a professional inspection. Contact Clean Energy Solutions for professional heat pump servicing, cleaning and expert advice to keep your wall-mounted heat pump operating efficiently.